Tuesday, January 31, 2012

Planing stringer & spokeshave

Started to plane the stringers and stem today. I am starting of with a rough planing mainly just getting close to where I am supposed to be, there will be another round of fine planing with the stringer-planing-jigg....

First I did the upper part of the stem.


Then I continued with the forward part of the port side, the pictures might show better what I actually did.

Look at where the stringers attach to frame #1, they are following the shape of the frames more.....

.... than on the starboard side where they still are in "steps"

Sorry about the blurry pictures but when you have been planing in a very unfamiliar posture for about an hour your arms tend to shake a litte. I am sure I will feel it tomorrow.

I did not use my jig but rather a small stick to make sure I did not plane too far, this one needs a little more.

After being too exhausted to plane any more (have rough planed about one quarter of the boat) I decided to get onto trying to fix up the spokeshave. I knew already that the cap iron/chip breaker was bad, what I found out today though was that it was not only bad paint but rather bad casting, so I had to drill up the holes for the screw. Please note that I have absolutely no idea what I am doing I am just testing things that seem sort of reasonable.

Before rehab

Holes drilled and some filing of the back

I also filed the blade bed as it was not really flat

The cap seems to fit better so time to try it out on some wood

No good! It cuts better but only for a little while, the cap is too far down and there is a big gap between the cap and the blade which gets jammed with wood shavings

So after another hour of filing (sorry no pictures) I decided to do the last adjustments with epoxy, this is a first for me so we will see how it turns out....!

Epoxying a flat surface? In the background you can see the speakers for my phone I have been going through the Furled sails podcasts in the past week or so, if you have not listened to them I can recommend them.

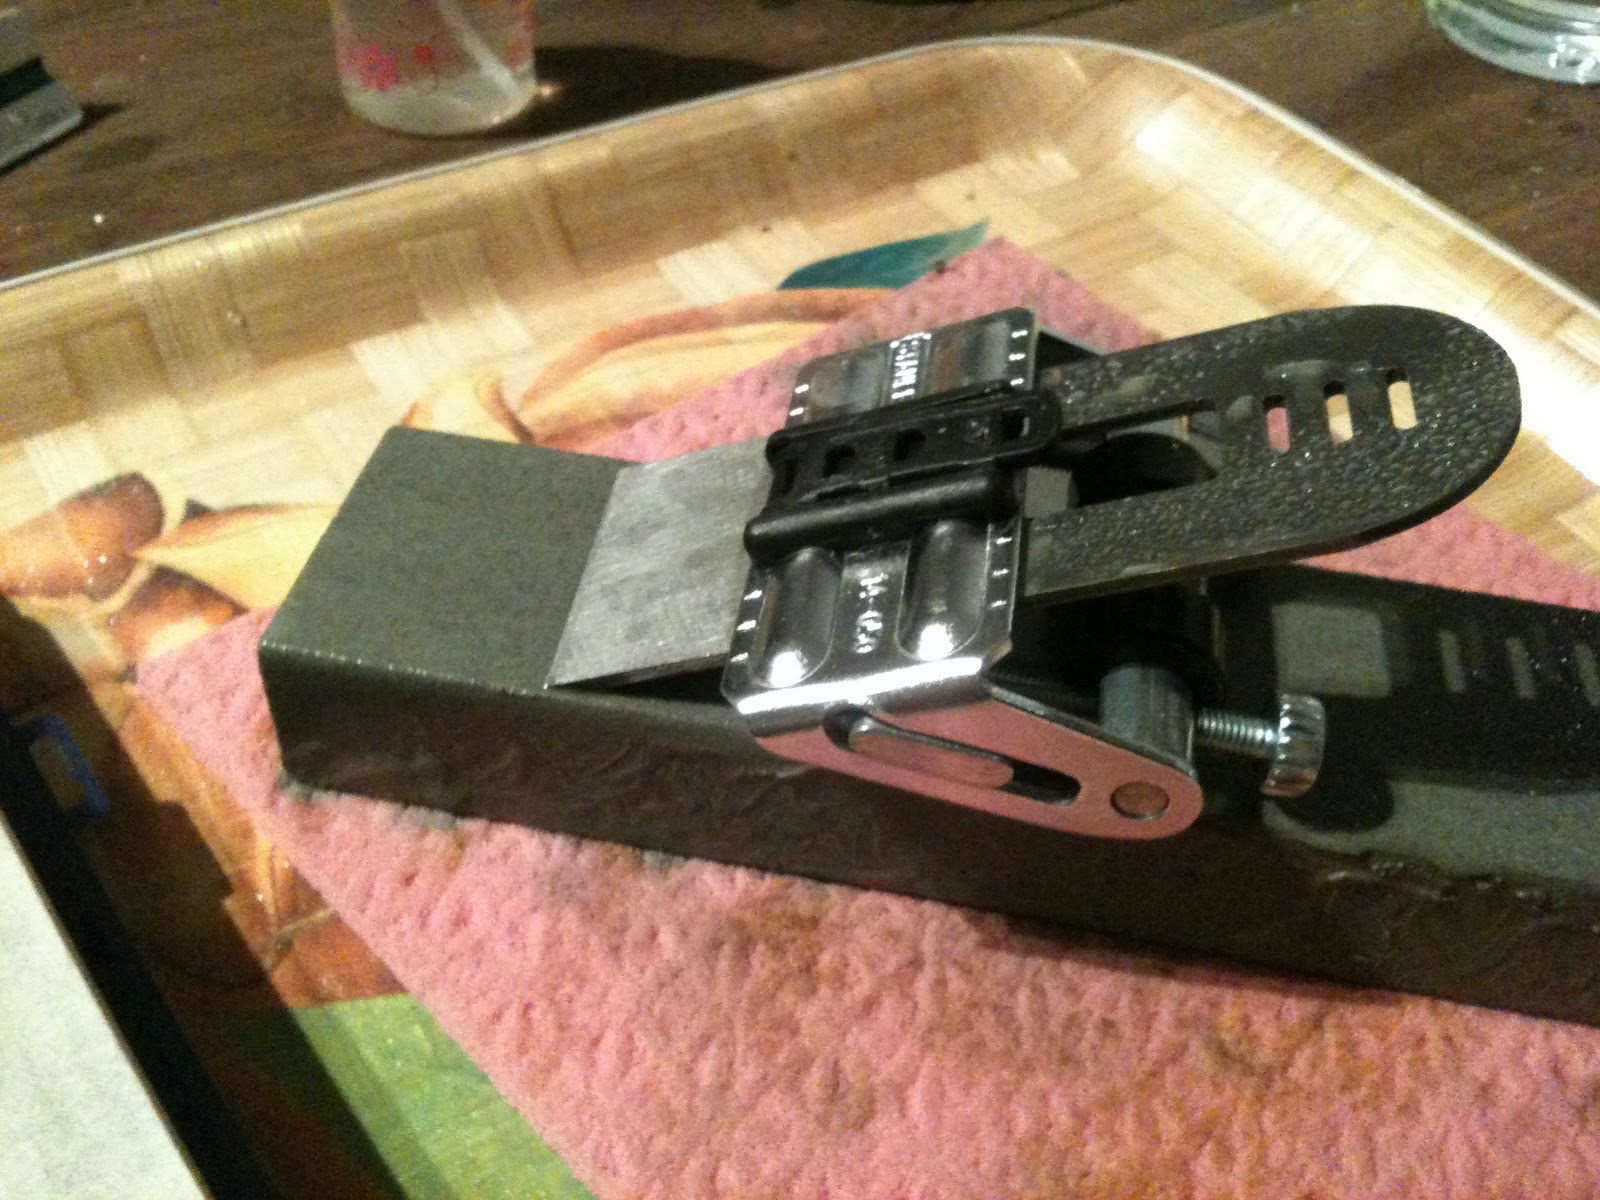
I put some packing tape on the spokeshave blade and the sole of the smoothing plane. The blade was used to get an even surface on the bed and the smoothing plane to get the cap plane. Smear on a thin layer of thickened epoxy and clamp it in, hopefully tomorrow I will have level surfaces. I also filled the hole for the cap screw so I can re-drill it slightly higher up.

Time today: 3h


Monday, January 30, 2012

Entering a new phase

Pulled the screws and the clamps of the last stringer pair, all went well. Now I am entering the next phase of the build, the stringers are glued in and it is time to start planing them so that I can get on with the planking.
So before getting into this I needed to clean up the garage and sharpen my planes.

Just a few days will create a lot of garbage

Tools in one place

Clamps in another

And a clean work bench

The planes that needed sharpening was the block plane (for some reason it had a lot of nicks in it maybe from planing epoxy) and the spokeshave (it was rubbish already when I bought it and I have not been bothered to fix it). So I thought I should show in a little more detail what I did with these two blades. The pictures will be a mix of the two but the process was the same for both.
(The blades have two bevels and I am not sure exactly what is the correct words in English so I will just call them primary bevel and honing bevel, if someone has the correct terminology please let me know and I will correct)

In addition to the stone I mentioned in my previous post, I fetched a coarse grained sand stone at my summer house when I was home for Christmas, this one I use to create the primary bevel. I also bought a honing guide during Christmas, it is a Stanley and is a new type to me, it is a little fiddly since you need to adjust two screws and it is quite difficult to get the blade straight but it gets the job done (pictures below).

Flattening the back on the sandstone

Cutting the primary bevel on the sandstone, 25 degrees

Same but on the 4000 grit stone

... and the 8000 grit

The primary bevel on the spokeshave, just getting started

Almost there

Primary bevel done, time to move onto the finer grits to polish it

This is how you set up the honing angle.

After the primary bevel is done I set the blade up for the honing bevel (30 degrees) and hone it on the 4000 grit and polish on the 8000

Here you can see the honing bevel

Then you need to remove the burr on the back side, I use the "ruler trick" it is not my invention you can read more about it here. Basically it makes a micro bevel on the back of the blade.

After the sharpening I could shave the hairs on my arms with the blades, a good sign to me. I have not yet dared to put a block plane to my face ;o).

Naturally I had to test them before calling it a day, the block plane shaved wood excellently but the spokeshave still was a little jumpy. So there are a few more things I need to fix with it, that is what happens when you buy cheap stuff.

The cap iron needs to be moved further down, the paint is so thick and badly applied so the screw is not in the right position

Secondly the base plate is badly machined so the blade does not get the correct support, maybe I could "cast" a new even base with epoxy?????

Time today: 3h (1h cleaning and 2h sharpening)

Sunday, January 29, 2012

All stringers installed

Another beautiful but cold day, so I drove up the coast to a place called Mechelinki. It was too cold for a long walk so I just had a short one.

Cold but nice

Back home again it was time to fit and glue the final stringers.

Cutting the forward end, small pieces at a time....

Quite happy with that one

Also did some other odd jobs like trimming the supports so that I can plane the bottom stringer properly

The starboard stringer was easy to get in place, the port one was a different matter (same as yesterday). I had to fight it badly and broke two clamps in the process.

Bang & Bang.... apparently this type is weaker than the yellow tipped kind

All glued in place

A view from above....

... and the whole thing!

Time today: 3.5h

Saturday, January 28, 2012

Bending the last stringer

Today was another stringer day, and it was also a sunny day so I had to open the garage door for a picture.

This weeks garage overview

This is how I intend to use the stringer-planing-jigg

Fixed stringer #3 with a sliver of wood

Towel steamed and bent in the final stringer on Starboard side.

The good thing with towel steaming is that you can adjust the heat in different parts of the piece. I was a bit worried how the epoxy scarf would hold up under the heat so I made sure I did not pour too much hot water in that area, with a steam box I could not have done that.

Then it was time for the last stringer, port #4. The scarf I made yesterday held up fine, but this was probably the stiffest stringer yet...

No breaks today!

I had to wrestle it a bit more than I was comfortable with, I screwed it onto frames #6, 5 & 4 and then we had the ...... BANG again. The stringer ripped the reinforcement ply's of the frames.

Well, shit happens...

So it was time to bring out the towel again, this time I decided to stem the whole stringer one piece at a time, sliding the towel along the stringer.

First steamin'

During the steaming session I also  managed to add some insulation to stop the draft from the top of the garage door. This increased the temperature in the garage from 14C to 18C :)

There was however a small problem, without the doublers I could not screw the stringer to the frames so how how can I attach them to the frames without screws? .........wedges and clamps!

I screwed wedges onto the frames so that I could use clamps to keep the stringer to the frames

Moving forward

Steaming the last bit

The last stringer clamped in!

  Time today: 3h

Friday, January 27, 2012

Cold

Winter is here for real, it is -10C outside so the garage is a little cooler than before. I have cranked up the heat so I am able to keep it at between 15 and 18 C, not too bad I am still in my t-shirt.

Cleaned up the scarf joint from yesterday and I am really pleased how it turned out, will leave it at least until tomorrow before bending it onto the boat.

Looking good, not sure if I could do any better

Did a few smaller jobs a spare gauge, a small jigg for planing the stringers, planing the sprit square and cut some excess wood.

I wanted to try having a support for when I will be planing the stringers that could be attached to both the smoothing plane and the block plane

Here is the beginning, I will cut it square between the screws and attach it to the planes with a small C-clamp (pictures tomorrow)

Making a spare gauge for the yard, boom and sprit. I put the measurements on it to illustrate how it is made.

Nails at the outer marks and drilled holes at the inner marks for pencil leads

And this is how you use it to mark the four sided piece of wood into an eight sided. The holes for the leads are a little too big so I will have to fix this before doing it for real.

Planing the sprit I glued up a few days ago

Trimming the King plank

After planing

Trimming the stem that was slotted into #1

I also spent some time today just standing and watching the boat that is growing in my garage, it is quite an amazing feeling and a very beautiful shape..........

Time today: 1.5h